

Macs were still around in those days.
Hard drivesWe all had plenty of space on our Macs but there was still too much.
SSDsThis feature is now less available on Macs, so high-resolution video, photos and music take up more space than ever.
Running out of space can really hamper your computing: if you want your Mac to run quickly you need to make sure you’ve got something like 10 percent of your storage free at all times otherwise your Mac can really slow down (read: How to speed up your Mac). At worst if you don’t delete some of the things taking up storage space on your Mac you may even find you can’t start it up one day because the startup disk is full! You may already be seeing warnings that your start-up disk is almost full – you shouldn’t ignore them.
Also, an operating system update may require you to clear some space from your Mac. When Apple released macOS Big Sur in 2020, for example, a lot of Mac users found that they didn’t have enough free space to install the new macOS (read: Big Sur is too small for the available space). Similar problems are anticipated. macOS VenturaIt will arrive in October 2022. Under those circumstances you are likely to look for the quick and easy ways to free up space on a Mac – so finding how to find out what is taking up the space on your Mac, and the best way to remove it, will be your priority.
If you aren’t sure how to see how much disk space your Mac has read:
How to determine how much space you have on your hard drive.
In this article we walk you through simple steps that will help you identify what is taking up space on your Mac, what you can and can’t delete, the safest way to remove the biggest space hogs, and how to manage the storage on your Mac so that you never run out of space again.
How to quickly clear Mac space
There are lots of ideas below for freeing up disk space below, but if you are in a hurry and you don’t need a lot of space, or if you aren’t too bothered about making sure you don’t run out of space again, here are a few things you can do right now:
- Click on your Downloads folder in the dock, open it in the Finder and select the contents, or any files you don’t need, right-click and choose Move to Bin/Trash.
- Navigate to your Home folder using the Finder (press Shift/command-H). Press Command-F to open a brand new Finder window. Click on the drop down beside ‘Kind’ and choose ‘Other’. Scroll down until you see ‘File Size’ and check the box next to it. Click OK. Now in the next dropdown choose ‘is greater than’. Change the file size to 100MB. Now select anything that you don’t need that’s bigger than 100MB and chose Move to Bin/Trash. (We found a number of Payloads files here, but we don’t recommend deleting them because they are part of the macOS Install Data and deleting them may stop your Mac performing optimally – if you do want to delete any of these files we recommend making a back up first!)

- You could set up a similar search to delete files you haven’t opened in the past year or longer. Choose Last opened date instead of Kind. Instead of ‘is’ choose ‘before’ and change the date to a year ago. Select and right-click on files you are sure you won’t need again and choose Move to Bin/Trash.
- If you’re anything like us, your Desktop is a place to dump everything. Start the Finder once more and choose the Desktop folder. Sort by Size and delete anything you don’t need that’s particularly large. You can also sort by Type to locate all Screenshots (which will then be PNG files). Select the Screenshots you wish to remove and click Move to Bin/Trash.

- Another way to delete screenshots is to go to your Desktop and if you haven’t already done so go to the menu and choose View > Use Stacks (you’ll need to have the Desktop selected). Find your Screenshot folder. Click on the folder to open it. Next, select the Screenshots you wish to delete. These can be clicked and dragged to the Trash/Bin. You could do the same with other files on your Desktop (it’s where most things end up after all).
- Now the final and most important step: Right-click on your Trash/Bin and choose Empty Trash/Empty Bin (we are doing this last as we’ve just added lots to the Trash!)
This might recover a few GB for you, and if that’s all you need then job done! If you need more space or want to avoid running out, then the steps below will help you.
How to see what’s taking up space on your Mac
Your Mac may be experiencing slowdowns due to a lack of storage. However, if your Mac runs out of storage, you might not be able start it up. You should first take a look at what is taking up space on your Mac before you go to this stage. This will help you decide what to delete.
Many apps will let you see which files take up large chunks of your disk space. Or allow you to place files in the Finder based upon their size.
You can get free or inexpensive apps such as GrandPerspectiveAnd DaisyDisk ($9.99/£8.99, It is available here) give good visual indications while OmniDiskSweeperUses the standard hierarchical window for file sizes to display the contents of each file and folder. CleanMyMac (which costs around $30/£30) shows disk usage as part of its cleanup features. Parallels Toolbox (around $15/£15) also has a Clean Drive tool along with lots of other useful tools.
However, before you spend any money, it’s actually really easy to get an overview of what’s taking up the space on your Mac.
This view allows you to see how much space certain objects are taking up. However, how can you delete that stuff?
- Click the Apple logo at the top left.
- You can choose about this Mac.
- Wait while the storage tab calculates. Soon you’ll see various bars that show how much storage was allocated to particular items, and how much storage remains.
- You can hover over each bar to see the contents and how much space it takes up. For example, in our case yellow was Photos (you could have 100GB+ of Photos, if you do we recommend using iCloud Photos to reduce what’s stored on your Mac).
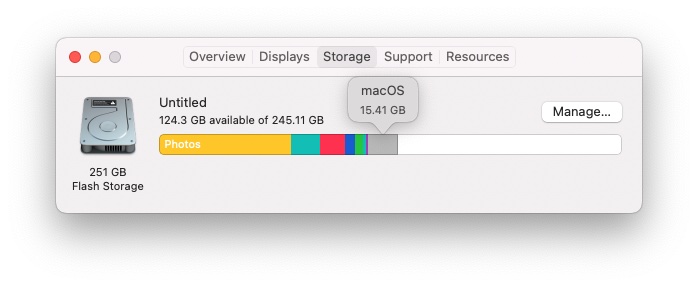
Foundry
What is the difference between System and Other?
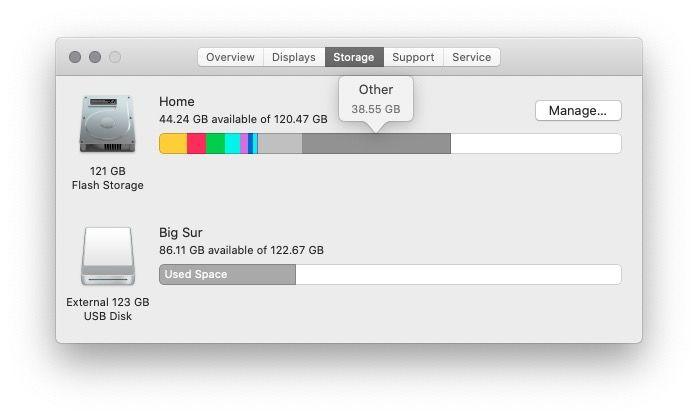
Some storage divisions in macOS older versions were called System and Other. These files fall under the macOS (as you can see).
If you are using an older version of macOS – which may well be the case if your Mac is a bit older and unable to support new versions – you may be confronted with almost 40GB of ‘Other’ (as we were, see below). We’ve heard of people having even more than 40GB Other storage. With a name like Other it’s no wonder that people are adssuming this is redundant files that can be deleted. In some cases they can be – but you have to be careful.
You might wonder if you could delete Other. That isn’t something you can do easily – and nor should you. We explain How to delete other files from a MacYou can find more information in a separate article.
System is the same. While it would not be wise to delete all of your System files immediately, there are some that you can live without such as Time Machine snapshots and iOS backups. A separate article is also available about what’s in System and what you can delete.
Tools like CleanMyMac X can help you deal with these Other and System files – and also files that come under macOS in newer versions of the operating system. CleanMyMac is £29.95/$29.95 ( here’s where you can download CleanMyMac). A roundup of all the The Best Mac CleanersWe will be looking at several alternatives to CleanMyMac, including: DaisyDisk, MacBooster, Parallels ToolBoxAnd MacCleaner Pro.
How Apple can help save space
Moving on from Other and System we are left with a number of things we can delete from our Macs – and Apple makes it really easy to do so.
Click on the Apple logo > About This Mac > Storage and now click on Manage.
You will see this if you’re running macOS a newer version.
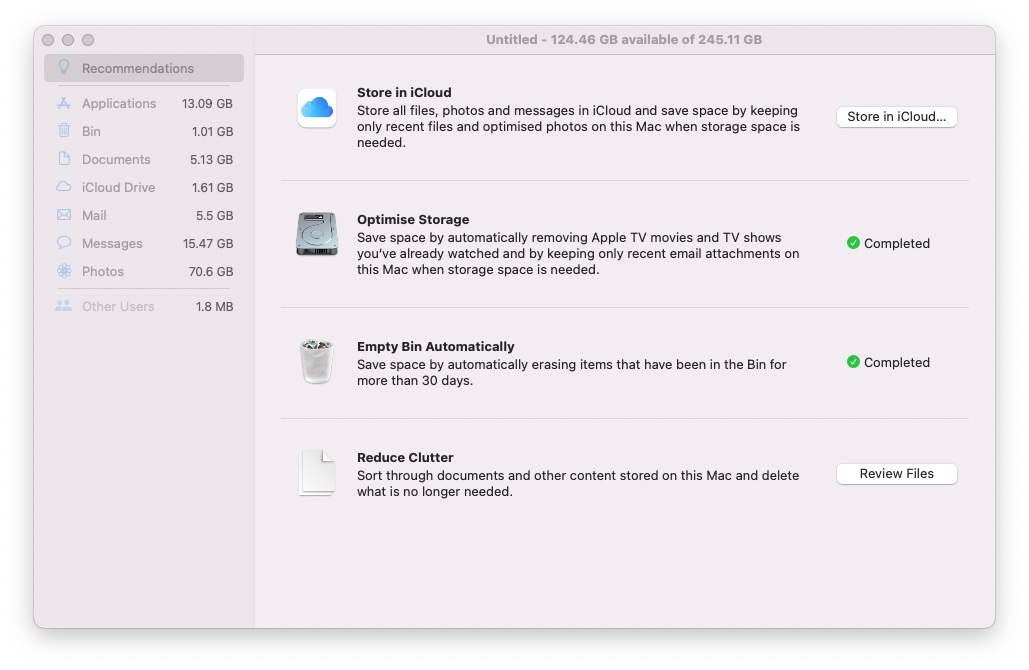
Foundry
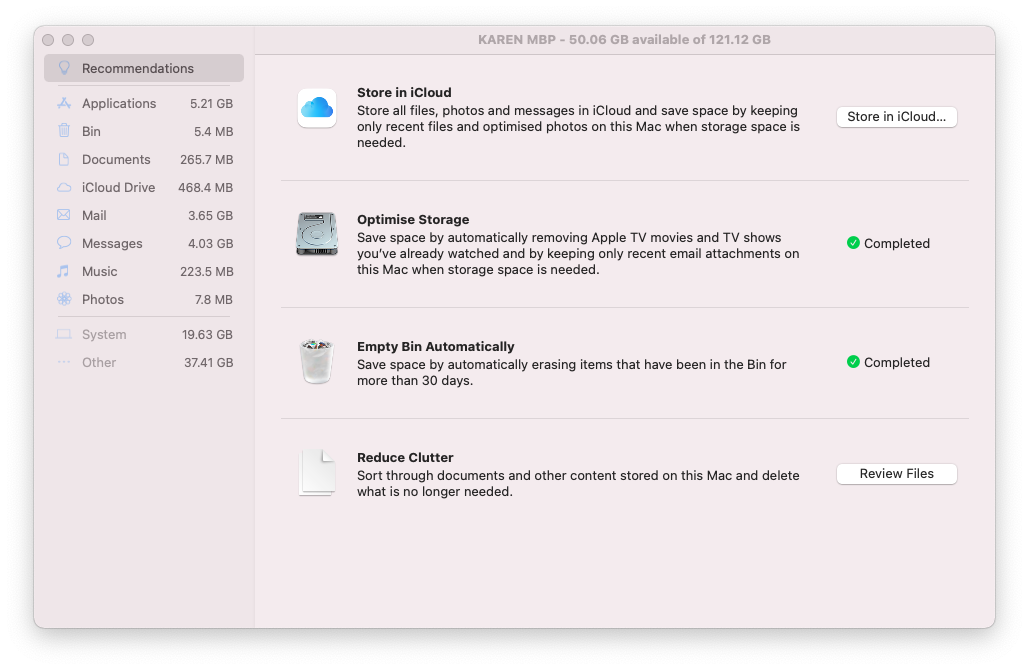
On older versions of macOS you would also see System and Other, which are greyed out indicating that you can’t access them.
To help you get rid of storage hogs, you can use the available options, such as Store In iCloud or Optimise Storage. We’ll go through each of these options in the sections below.
Keep your data safe with iCloud
If you need to reclaim a lot of space on your Mac, we recommend that you use the Store in iCloud option. Apple’s actually upgraded iCloud – it’s now iCloud+ and includes a number of additional features, but the price hasn’t gone up. Read:
iCloud+ now includes a range of new features.
The Store in iCloud option allows you to store files in iCloud. It’s a great option if you have limited storage on your Mac: get yourself a nice chunk of storage in the cloud and keep everything you need there. If you don’t mind paying for it this is a great way to extend the storage available to you.
Foundry
Apple gives users 5GB of iCloud storage for free, but that’s not going to to be of much help here. Apple has a range of storage plans available. You should find something that suits your needs. The Prices for iCloud storageThese are your options:
- 5GB Free
- 50GB: 79c/99c per month
- 200GB: £2.49/$2.99 a month
- 2TB: £6.99/$9.99 a month
Apple One is a bundle deal where you can get iCloud storage in addition to Apple Music, Apple TV+, and Apple Arcade. Prices start at £14.95/$14.95 a month. Read
Should I buy an Apple One?Click here for more information.
If you spend some money on iCloud, and store your desktop and documents and all your photos there, you can save a huge chunk of storage and an even bigger bonus is the fact that you’ll be able to access those files and photos on any Apple device you own or by logging onto iCloud with your Apple ID.
Here’s what you need to do to make space on your Mac by moving files and photos to iCloud:
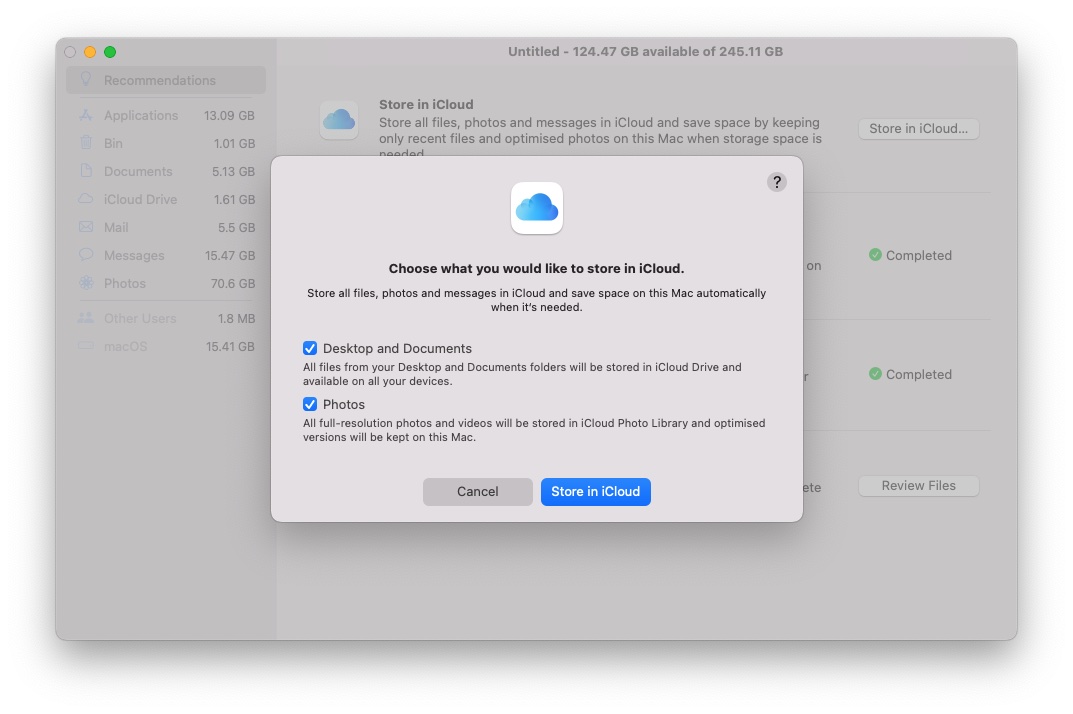
- Click on the Store in iCloud option (via About This Mac > Storage > Manage).
- This opens a window asking for your selection of what you want to store on iCloud. These files can include all files on your Mac Desktop, your Documents folder, and all of your photos. You can choose to use both.
- Click on Store in iCloud.
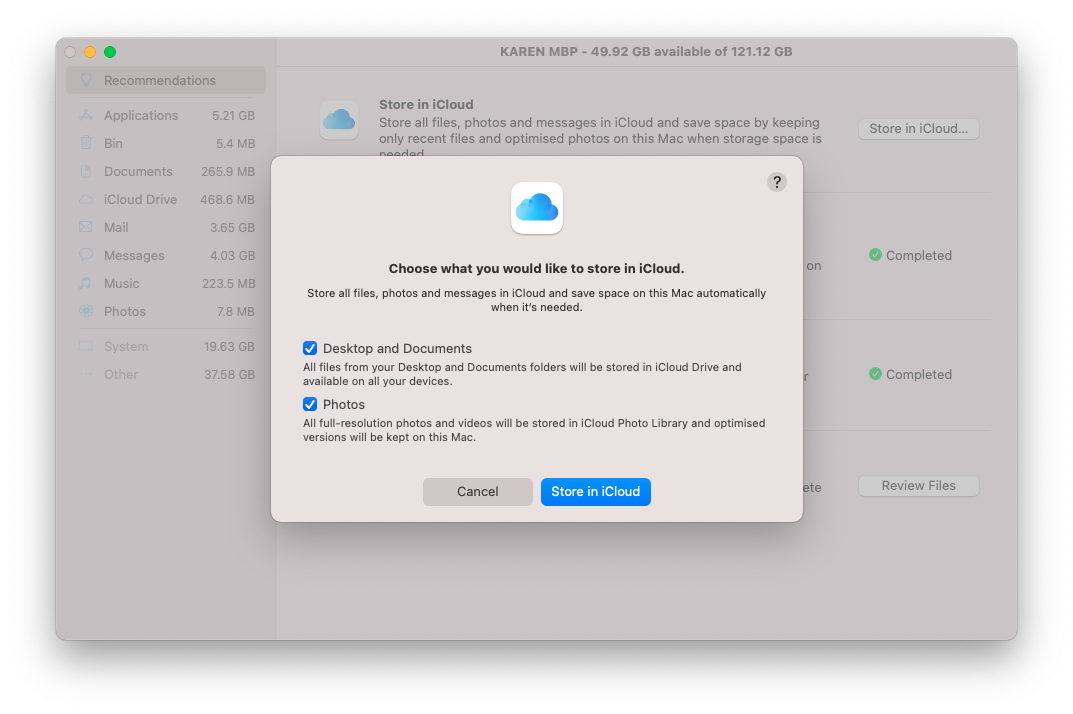
If you want to really cut back on the amount of space taken up by your photos we’ll discuss some more changes you can make below in our Reduce photo library section
You will notice that if you already have iCloud Photos enabled (in the Photos App), you’ll see a message indicating that you have set it up. Go to Photos > Preferences > iCloud to check that you don’t have Download Originals to this Mac selected.
Deselect Photos to ensure that your Documents and Desktop are in the cloud. Click on Store in iCloud.
Optimise Storage
Optimise Storage is Apple’s next recommendation after Store in iCloud and turning on Optimise Storage is a really easy way to stop your storage getting clogged up on your Mac.
If you turn on Optimise Storage it will delete TV shows or films that you’ve watched and it old email attachments will be removed. You needn’t be afraid of losing either of these things because the emails will still be stored on the email server anyway, and the shows you had purchased from Apple can always be downloaded again for free.
To choose this option go to About My Mac > Storage > Manage and click on Optimise Storage.
This option will optimize your storage automatically after you’ve chosen it.
Automatically empty trash/bin
We have already talked about emptying the trash. Quick ways to increase your Mac’s storage.
It is easiest to empty your trash by right-clicking on the trash can icon, and choosing Empty Trash/Empty Bin.
However, you can also click on Trash in the side-bar on the left of your About My Mac > Storage > Manage window and delete it there.
It’s really good practice to empty your Trash regularly though and Apple has a great way to automate this action.
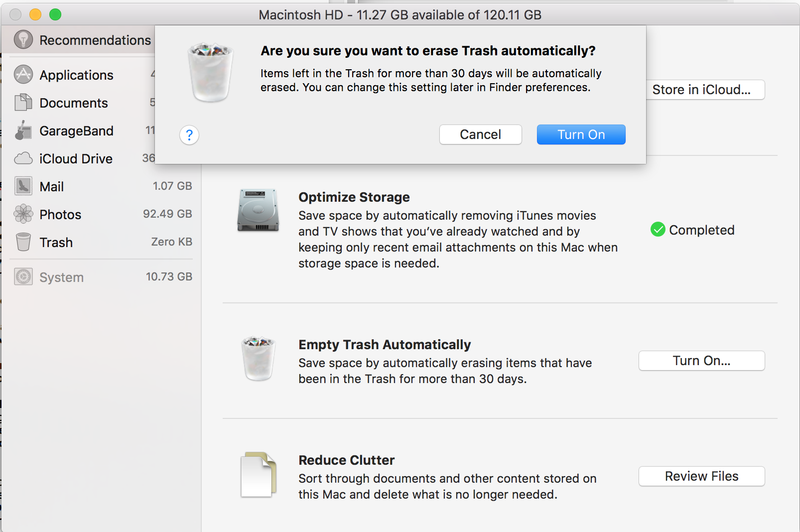
If you choose Apple’s Empty Trash Automatically recommendation it will empty files out of your Trash (or Bin if you are in the UK) after they have been there for 30 days. Here’s how to set it up:
- Switch this option on in About My Mac > Storage > Manage.
- Select the Automatically Empty Trash option.
- Click Turn On…
- You will see an alert asking if you’re sure you want to erase Trash automatically. It should be pretty safe as 30 days is a long time to realise you didn’t mean to delete something, so we recommend you click Turn On.
Reduce clutter
This is Apple’s final Recommendation found in About My Mac > Storage > Manage.
Reduce Clutter will review the content of your Mac and make it easy for you to delete files you don’t need.
TIP: Instead of opening files to view what you are considering deleting or to open documents, click on the file to preview it.
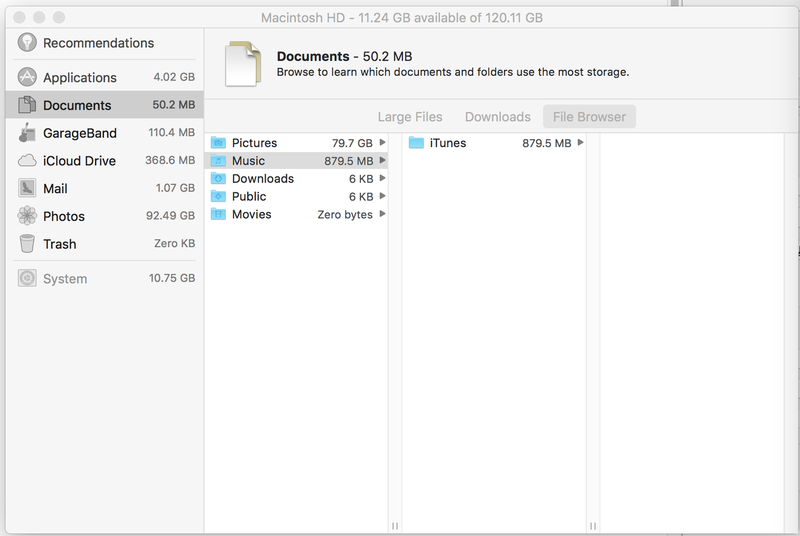
Click here Review FilesClick on Large Files to open a pane with tabs that show tabs for Unsupported Apps or Containers. You may also see a File Browser depending on your macOS version. This is the exact view that you’d see if your clicked on Documents on the side-bar to the left.
The first port-of-call is Large Files. You can determine whether to delete them or not based on the information provided which includes when you accessed them last and their size. There may be many dmg file here.
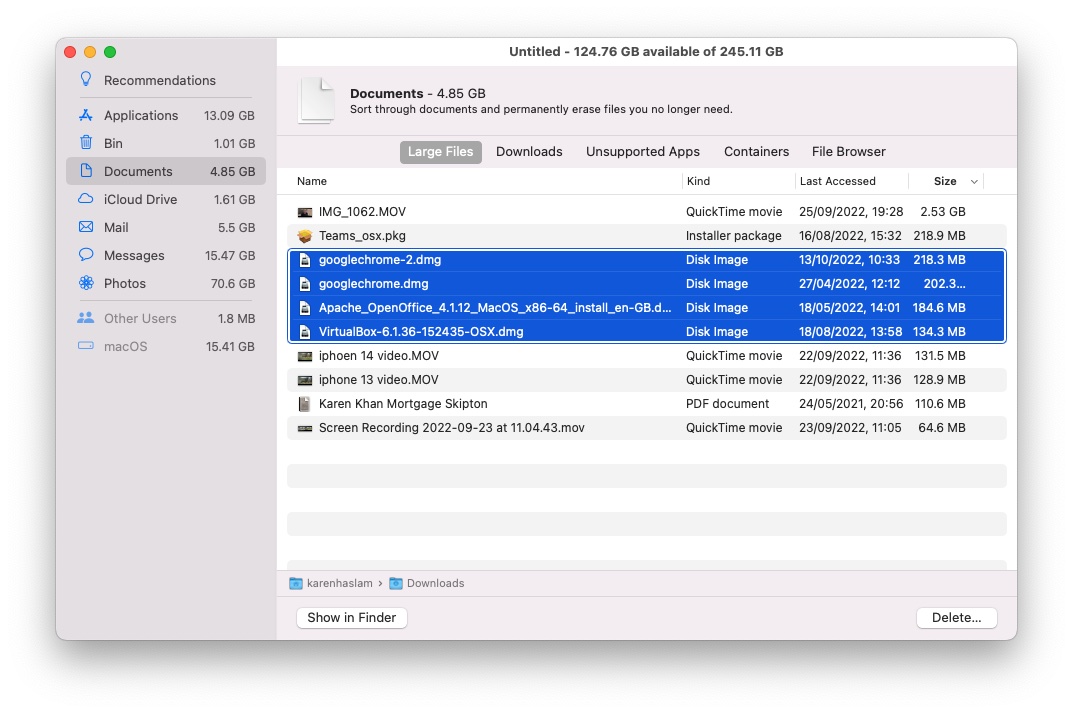
Foundry
Next option is Downloads. This isn’t the same as your Downloads folder. It’s every file you have downloaded from the internet. There are likely to be dmg file you can delete. Sorting by type is a good idea. You can delete Zip archives that have likely been unzipped already and save them where you need them.
The good thing about deleting files this way is that it won’t just move them to your Trash. If you delete files using the finder, you’ll also need to empty trash. But that’s a good reason to be cautious too!
Have any questions? Unsupported AppsThey will be found in this section. For example, you might find 32-bit apps in this section.
We’ll skip Containers as it’s unlikely that there will be anything in that view for you to delete.
In File BrowerYou can quickly access folders such as Pictures, Desktop Music, Movies, Movies, and Documents.
There are many ways you can save space on your Mac
These are the steps Apple offers to help manage your Mac’s storage. We’ll now go in to a bit more detail on some of the other ways to save space, of which there are many.
1. Minimize your Mac photo library
It is possible to save space if you have a lot of photos. There are many apps that can delete duplicate photos from your Mac, such as
Photos Duplicate CleanerOr
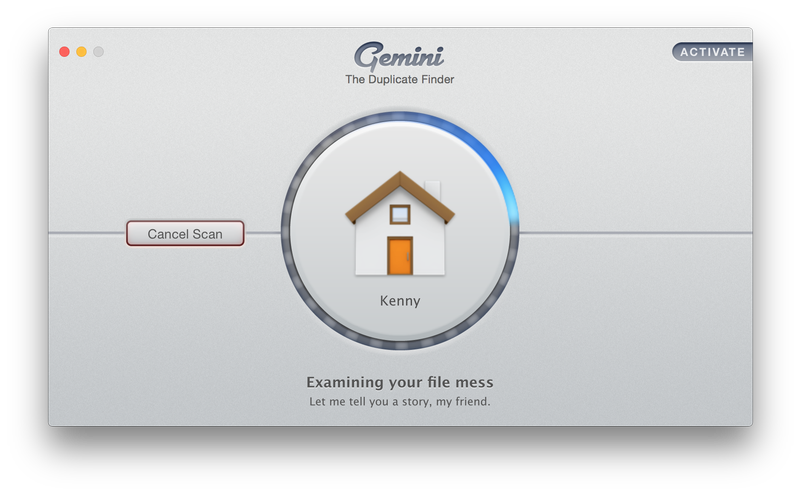
MacPaw’s Gemini 2The second offers to
Remove duplicate files from your Mac.)
You can reduce the number photos stored on your Mac by moving them to iCloud.
We already touched on Photos above, when we mentioned that if you choose the Store in iCloud option in About This Mac > Storage > Manage you can choose to store your photos in iCloud.
The advantage of using iCloud Photos Library is that all photos uploaded to your Mac will appear on other devices, such as your iPhone, iPad, and so forth.
Before turning on iCloud Photo Library our Photo library was 96GB. So we paid for 200GB of storage space. We upgraded to 2TB months later as we were storing all of our documents, desktop and photos in iCloud. A Family account can share 2TB of iCloud Storage.
- You might have turned on iCloud Photo Library, but if you haven’t already you could do so in the Photos app. Go to Photos > Preferences.
- Look for the box next to iCloud Photos.
- This is very important. Select Optimise Mac Storage for high-resolution photos that are not resized. You can also download low-resolution versions if necessary.
As the high-res versions of your images switch to low-res, your library should shrink. But note that you will also get low res versions of all the images you have on all of your devices, so it’s possible that you may not save a lot of space.
You should be aware that if you delete photos on your Mac, they will also be deleted from iCloud. iCloud isn’t a way to backup your photos so you can delete them.
You can remove your photo collection to make space, check out our next suggestion.
2. Move photos to external storage
You can also free up space by moving your photo collection to an external hard disk. A separate article describes this option.
How to move your photo collection from your Mac to an External Drive, but we’ll summarise the steps below.
- Quit Photos.
- Copy your Photos Library files to an external hard drive. You can save your photos library from being deleted again by pressing the Command key.
- When the files are finished copying, hold down Option/Alt while you open Photos.
- In Photos select Photos > Preferences and in General choose Use as System Photo Library.
- The Mac might get busy if iCloud Photo Library is enabled. However, it should finish without requiring a large data transfer.
3. Move your music library
You might consider reclaiming disk space from your Music library (iTunes on older macOS versions). This is especially true if you spent a lot importing CDs years ago. There are a few options if your iTunes library contains a few gigabytes of music.
You can copy everything from your Music directory onto an external hard drive, and then point Music/iTunes from Preferences to that folder. That’s great if your Mac is a desktop model, but not ideal if it’s a notebook – unless you have a
NAS driveTo which you can connect wirelessly. A separate tutorial is available.
How to transfer your iTunes library to an External Hard Drive
Another option is to pay £21.99/year to subscribe to iTunes Match. Here’s
How to set iTunes Match up. Apple Music memberships include all the benefits of iTunes Match as well as access to the entire Apple Music catalogue. So you don’t need both.
Once you’ve set it up, iTunes Match allows you to access all the music in your music Library on Apple’s servers, meaning you don’t have to have it stored locally at all. You’ll need to be connected to the internet in order to play music, but other than that, it’s just like using Music/iTunes with locally stored music.
You can also download music from iTunes Match at a later time, which is a bonus. These files are 256-bit AAC files, which are likely to be of higher quality than those you have stored on your Mac.
The final option here is to subscribe to Apple Music, Apple’s service that for £9.99 a month gives you access to its whole music library, so assuming that all the music you enjoy is on iTunes you can delete all your music from your Mac and just stream the music from Apple Music instead.
If at a later date you decide not to subscribe anymore, you will always be able to download for free any tracks you bought from the iTunes Music Store before you took out the subscription, but note that unless you have iTunes Match you won’t be able to download tracks that you uploaded to your iTunes library yourself, so don’t throw out those CDs just yet.
4. Unwanted apps can be removed
There is an option in Mac > Storage > Manage to remove unsupported apps, but what about the other apps you have installed but don’t use and don’t need?
Deleting apps is pretty simple on a Mac – normally – and we cover it in detail here:
How to uninstall Mac Apps.
- You can delete an app from your Applications folder by clicking on it and choosing Move to Bin/Trash.
- You can also press F4 to open Launchpad. Find the app and press Alt/Option. Hover over the app. To delete the app, click on the x.
However, preferences (plists) and application support files are sometimes required for macOS apps. They can exist in many places on your Mac. In those cases the methods above won’t delete all the associated files and libraries associated with an app.
An app that completely deletes all trace of an app can be used to ensure complete deletion.
Uninstallers are available for some major apps. For example, you’ll find one of these in the Additional Tools folder of Microsoft Office. Sometimes an app’s installer doubles as an uninstaller. But the lack of a dedicated uninstaller in macOS is a serious omission.
There are many options for third-party solutions.
AppCleaner (free,
Download from the Mac App Store),
AppDelete(£7.99)
AppZapperAs well as being a good option at $129.95, there are also other options.
CleanMyMac X,
UninstallerAnd
CleanApp.
Another tip is that you should close all background apps. It is a good idea to close any apps that have been open longer than a few days. You can also restart your Mac regularly to free up disk space.
Applications create temporary files to save data. The longer an app runs, the more large those files will become. The cache files are deleted when you close the app and the disk space is returned.
5. Remove duplicate files
Duplicate files identified and deletedAnother way to free up disk space is by using the iSCSI method.
Gemini costs £15.95 on the Mac App Store (in the US you can buy it on the
Mac StoreYou can scan your Mac to find duplicate files, and then you can delete one.
Do duplicate files occupy too much space on your hard drive? While hard drives may be getting bigger and cheaper, Apple’s direction is that of smaller, faster SSD drives. These SSD drives have smaller capacities, so it is important to maintain a high level of filing discipline.
There are many reasons you might end up with duplicate files. When you add songs to iTunes, if you have ‘Copy files to iTunes Media folder when adding to library’ checked in the preferences, you keep the original. Instant duplication. A couple of thousand high quality songs and that’s anything up to 10GB hard drive space wasted. And that doesn’t include dupes within iTunes.
If you use Apple Mail, remember that all attachments reside in Mail’s own download folder. This could lead to duplication.
The majority of generic apps employ different criteria and strategies to find duplicates, and you have control over which ones you want to remove. Take a look at
Tidy up($29.99)
Singlemizer (£9.99/$9.99
The Mac App Store).
macOS supports a range of languages, being localised for more than 25 languages all of which are included automatically during installation. Go to System Preferences > Language & Region; here languages can be put into preferred order making it easy to switch between them.
Many major applications support multiple languages too, using the order from Language & Text to select one if the app doesn’t support your main language. The problem is that if you only want to use one or two languages, macOS and many of your apps are bloated with all the others.
If you want to delete extra language files that you know you won’t be needing, go to the Resources folder and look for folders ending in .lproj. Each folder will contain a language file. These folders should be easy to throw away.
7. Removing unwelcome code
Another disk-saving tip is getting rid of any unwanted code.
MonolingualDonation requested to remove specific architectures and specific languages from macOS. While it can claw back huge swathes of hard drive space, it can also render your Mac unbootable if you’re not careful. Take care.
8. Use cloud storage space
We’ve discussed iCloud already, but there are other cloud storage options.
Cloud storage services are great for storing files remotely but can also take up space in your Mac. Both
DropboxAnd
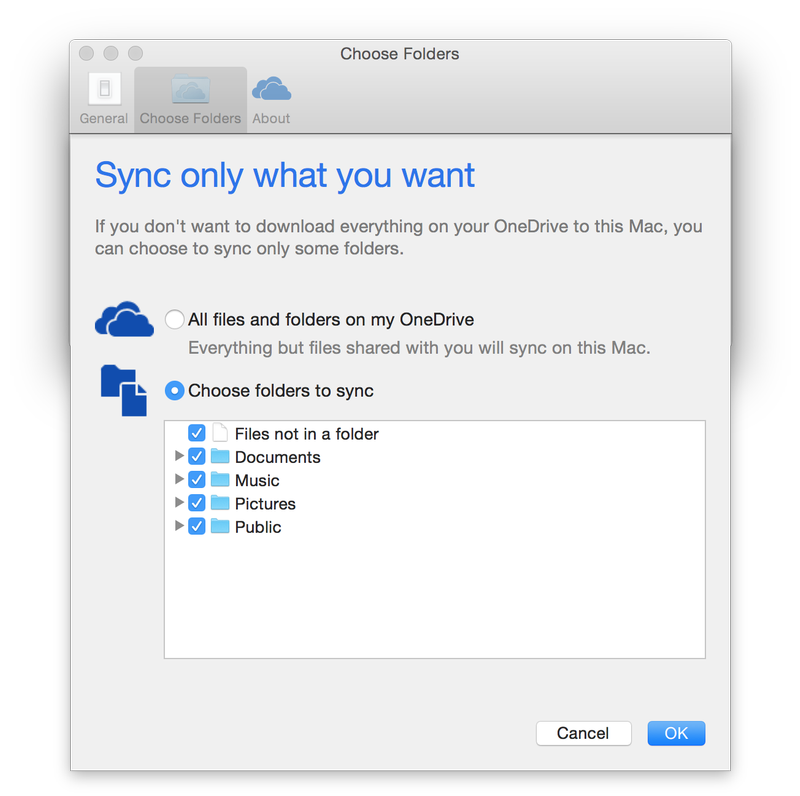
OneDrive, for example, sync everything you store in them with your Mac by default – assuming you’ve installed the Dropbox/ OneDrive app.
If you only have the default 2GB storage available for free from Dropbox, that’s not too much of a problem. Microsoft Office 365 subscribers get 1TB of storage free. This means that if you store a lot files on your computer, you might run out of disk space fast. You can also get more Dropbox space by paying extra.
You can choose to sync files or folders that you have specified in either case.
Dropbox: Click the menu bar item and click Preferences. Click on the Account tab and then click on Change Settings. Now untick the files and folders you don’t want to sync with your Mac.
Click the menu bar item in OneDrive and then Preferences. Click Choose Folders, choose Folders, and then select the folders you wish to sync. You can untick folders or click on the expand icon to see individual files.
Another option is to sign up for additional iCloud storage as mentioned above.
9. Archive or backup
You might be thinking I need the space, but I don’t want to delete anything! Here are some simple tips for data squirrels.
Archive any files you’re unlikely to need regularly. Select the compression option by pressing Ctrl-clicking on a folder. (Here’s more info on
How to zip Mac files.) The amount of space saved will depend on the type and file that is being archived. JPEGs (and DMGs) are less likely to compress than JPEGs. Archive files can be either saved to an external drive or left on your Mac after they are created.
If you decide to delete files and folders, remember to always
Support them first.
